Quick Start Guide
Quick Start Guide
Follow these steps to get your first gallery live on your WordPress site.
Step 1: Activate the Plugin
After installing FW Gallery, go to Plugins in the WordPress admin sidebar and confirm the plugin is active. Once activated, a top-level FW Gallery menu appears in the admin sidebar, giving you access to all gallery management sections.

Step 2: Create a Gallery Category
Go to FW Gallery → Categories and click to create a new category. Fill in the following key fields:
- Title — the gallery name displayed to visitors
- Description — optional text shown on the gallery page
- Cover image — the thumbnail shown on gallery listing cards
- Published — set to published so the gallery is visible on the frontend
Save the category. Note the ID shown in the URL or category list — you may need it for the shortcode in Step 4.
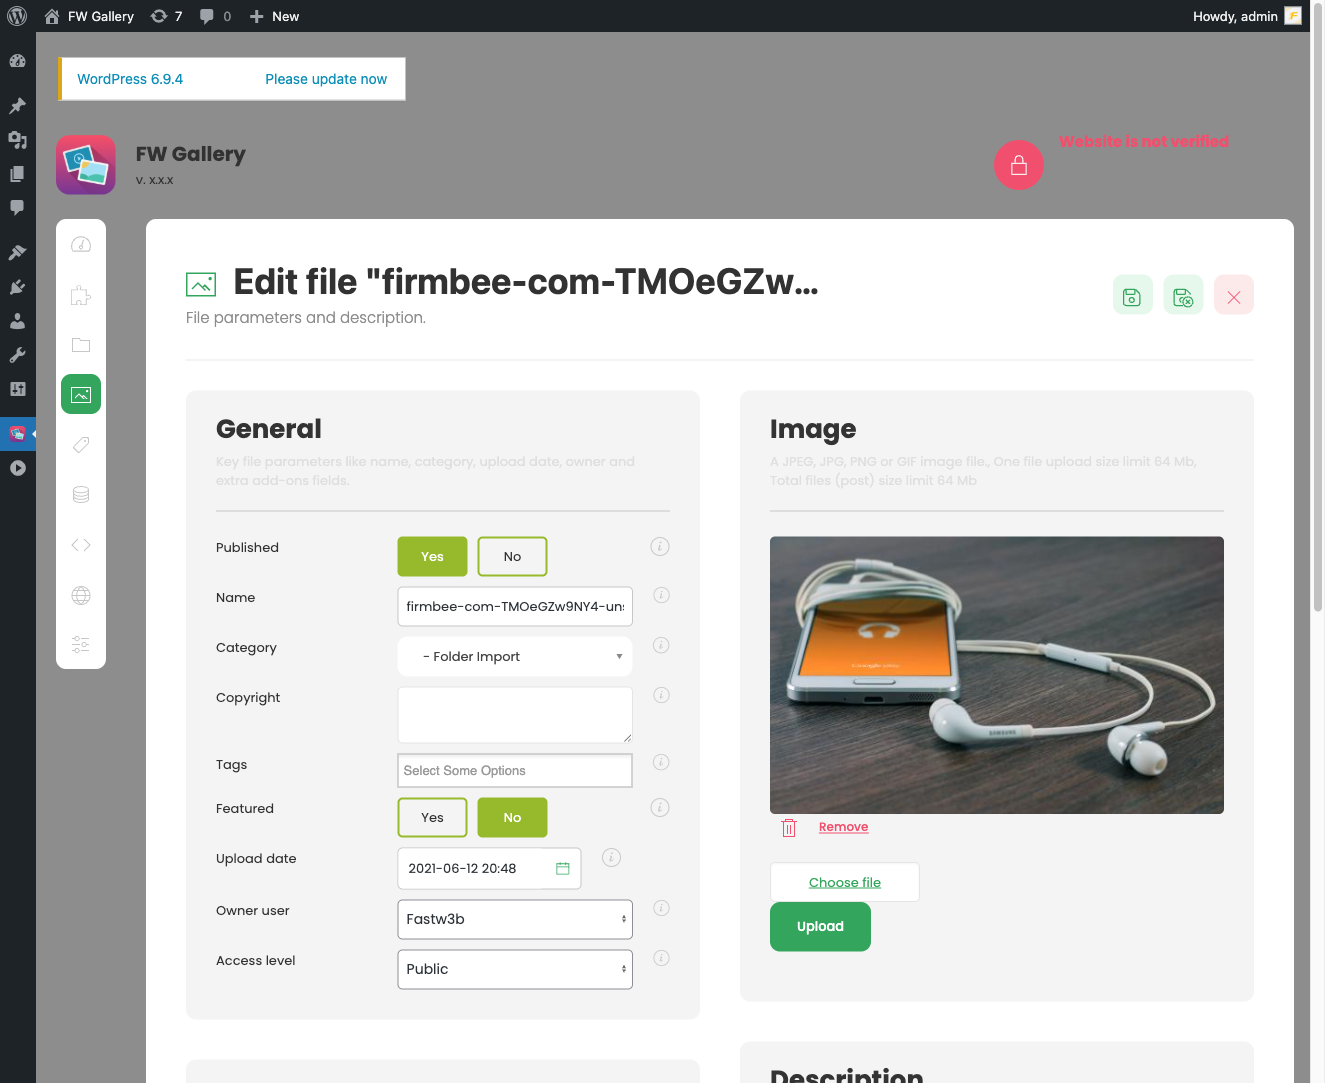
Step 3: Upload Images
Go to FW Gallery → Files and add your images. For each file, complete the essential fields:
- Title — the image name shown to visitors
- Image / Media — the uploaded image file
- Category (Gallery) — assign the file to the gallery you created in Step 2
- Published — set to published
Repeat for each image you want to include. Images are resized automatically on upload according to your configured image size settings.
Step 4: Add the Shortcode to a Page
Create a new WordPress page (or edit an existing one). In the page content, insert the following shortcode:
[fwmg_categories]
To display a specific gallery rather than all galleries, include the category ID:
[fwmg_categories category_id="1"]
The shortcode accepts additional parameters to control layout and behaviour. For example:
layout="grid"— sets the display layoutadd_params="files_count:20|ordering:date"— controls pagination and sort order
Step 5: Publish and View
Publish the page and open it in your browser. Your gallery images will appear in a grid, with lightbox navigation enabled by default. Visitors can browse images directly on the page.
If nothing appears, check that:
- The gallery category is set to Published
- At least one file is published and assigned to that category
- The shortcode is inserted correctly with no extra characters
Once your gallery is working, explore FW Gallery → Settings to configure image sizes, thumbnail dimensions, watermarking, and display options to suit your site.