 FW Gallery – Documentation
Quick Start Guide
Quick Start Guide
Follow these steps to get your first gallery live on your Joomla site.
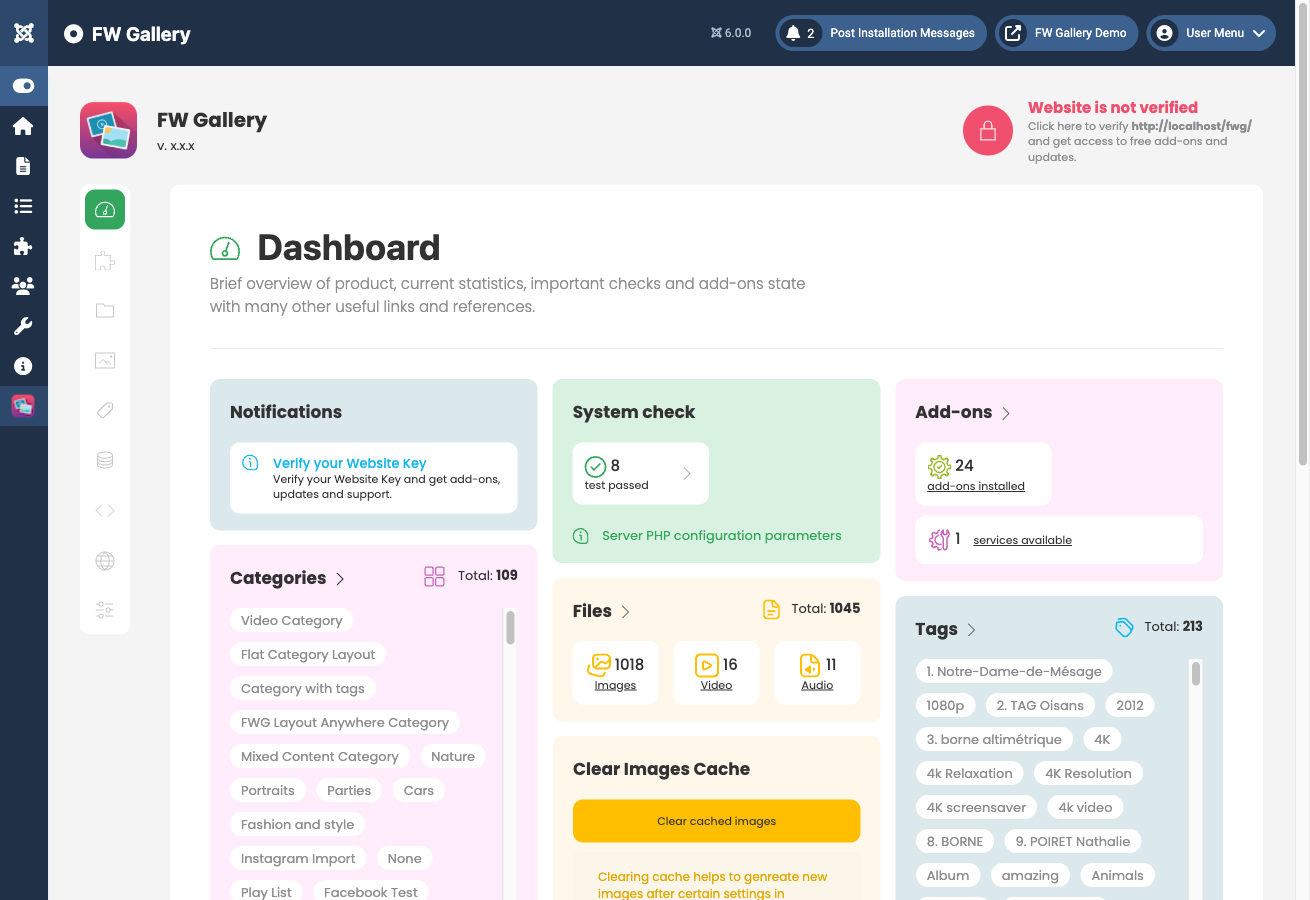
Step 1: Install and Activate Plugins
FW Gallery uses plugins to add layouts, media types, and extra features. After installing the component, go to FW Gallery → Addons in the Joomla administrator. Enable the plugins you need — at minimum, enable a design template plugin (such as Beauty, Classic, or Fancy) so your gallery has a layout to display files.
Step 2: Create a Gallery (Category)
Go to FW Gallery → Categories and click New. Fill in the key fields:
- Title — the gallery name visitors will see.
- Description — optional text displayed above or beside the file grid.
- Cover image — the representative thumbnail shown on gallery listing cards.
- Published — set to Yes to make the gallery visible on the frontend.
Save the category. You can create nested galleries later by setting a Parent on any category.
Step 3: Add Images and Assign Them to the Gallery
Go to FW Gallery → Files and click New. Complete the file form for each image:
- Title — the headline displayed to visitors.
- Image / Media — upload the image file.
- Category (Gallery) — select the gallery you created in Step 2.
- Published — set to Yes.
Save and repeat for each image. You can also bulk-upload files and then edit their details individually.

Step 4: Create a Menu Item
Go to Menus in the Joomla administrator and select the menu where you want the gallery to appear. Click New, then click the Menu Item Type selector. Choose FW Gallery → Gallery from the list.
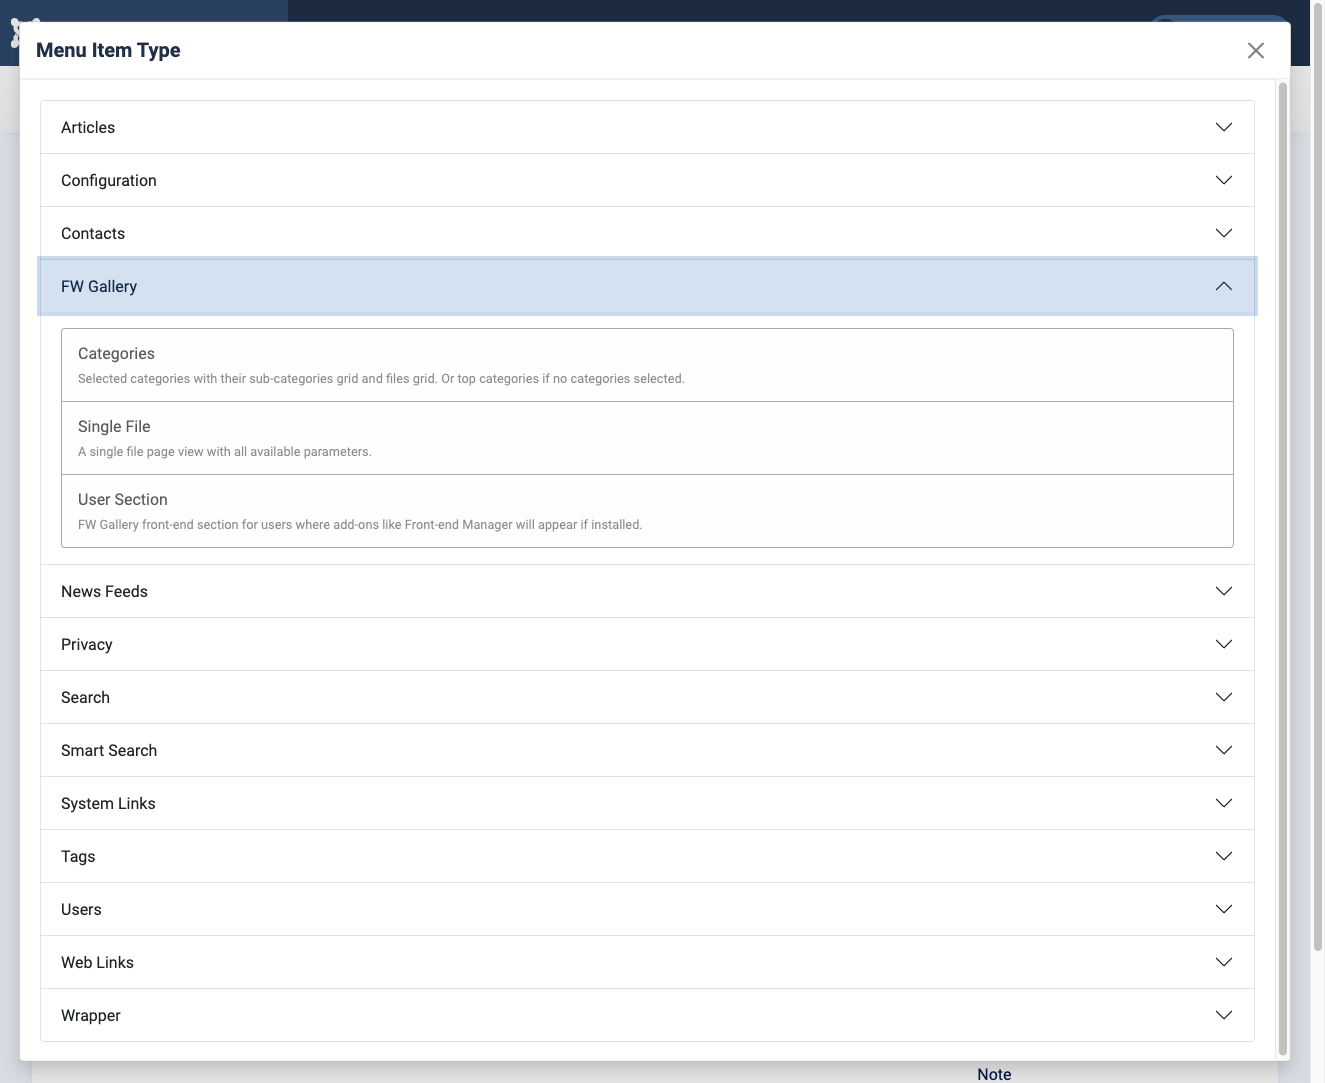
After selecting the type, a Category field will appear. Select the gallery you created in Step 2. Give the menu item a title, set it to Published, and save.
Step 5: View the Result on the Frontend
Open your site's frontend and navigate to the menu item you just created. You should see your gallery with the uploaded images displayed in a grid. Clicking an image opens the lightbox viewer with the full-size version.
If the gallery appears empty or unstyled, check that:
- The category is published.
- The files are published and assigned to the correct category.
- At least one design template plugin is enabled in FW Gallery → Addons.
- A default design is selected under FW Gallery → Settings → Galleries.